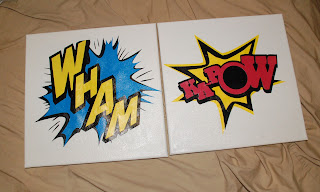
A few of the projects were ones I already had in my head for other purposes, one being my boys superhero room. They have been asking to have a Superhero room for several months now, and my head has been spinning with a bunch of ideas on how to do it. I am not a huge fan of the Character sets you can buy, so I am trying to craft their room around primary colors, with a really graphic retro look.
The first project I worked on for their room is a pair of Superhero automotopia signs that say "Ka-pow" and "Wham". These were pretty easy, and they turned out so good that I wanted to share how I made them with you!
Materials Needed
- 2- 12 x 12 canvases
- Mod Podge
- Foam Brush
- 5- 8.5 x 11 Sheets Black Cardstock
- 3- 8.5 x 11 Sheets Yellow Cardstock
- 2- 8.5 x 11 Sheets Blue Cardstock
- 1- 8.5 x 11 Sheet Red Cardstock
- Silhouette Machine
- Ka-Pow cut shape
- Wham cut shape

- First thing you need to do is open up the cut shapes in the silhouette. They are sized to fit an 8.5 X 11 sheet, but we want to make the bigger. Un-group the shapes (Ctrl+U) and layer them on top of each other so you have it made into the final shape. It helps to fill each piece with the color you will be cutting it from. It should look something like the picture to the right. Now re-group the layers (Ctrl+G), and re-size the group so that the largest side is 11 inches. Make sure you have "lock aspect ratio" selected so you don't get it stretched strangely.

- Next we are going to un-group them again (Ctrl+U) and separate them. If you have a Silhouette Cameo you can just cut each layer as is. I have a silhouette SD, so I have to cut up the pieces so they will fit in my cutting area. Start with the bottom layer (Yellow on Ka-pow, or Black on Wham), and center it in the cut area. Then take you knife tool and slice down the center of your image. Repeat on all layers you cannot fit in the 8.5 x 11 space. It should look similar to the picture to the right. You will end up with five peices for the "Kapow" and six pieces for the "Wham".
- Cut each piece from the appropriate color cardstock.
- Starting from the bottom layers, assemble and Mod Podge each layer on to a 12 x 12 canvas in order. Make sure you use plenty of Mod Podge! One all layers are added on Mod Podge the entire surface, or spray with an acrylic spray to keep your masterpiece in place. Let dry thoroughly.
- Hand them to your children and let them pretend to be superheros before you hang them (the pictures, not the kids!) on the wall.

 There
you have it! Super cute Superhero art work for your kids room! I would
estimate that the pair of signs cost me about $5 to make. That is a
super deal! :)
There
you have it! Super cute Superhero art work for your kids room! I would
estimate that the pair of signs cost me about $5 to make. That is a
super deal! :)When the boys room is all done I will make sure to give you guys a tour! There will be lots of DIY and re-purposing going on. Some of the currently planned projects are a superhero mod podged table, a superhero tea set, and a superhero dress-up station! Stay tuned for the details!

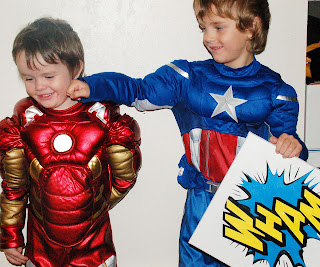
Captain America better watch out. When Iron Man gets that Kapow! down, there's going to be trouble in heroland.
ReplyDeleteThey are so cute! I love Captain's hair right now. I like the signs too! It's just, you know, I notice the kids first.
This was the only picture Dominic got of Captain America pretend hitting Iron man. Most of them were the other way around! That Iron man can pack a punch, he had a hard time with the "pretend" concept.
ReplyDeleteI can't wait to hang the canvases up. They turned out so cute!